Your Essential 2025 Checklist: What Do You Need For Snow Tubing?
กันยายน 3, 2025
Abstract
An examination of the requisite preparations for snow tubing reveals a multifaceted process that extends beyond the mere acquisition of a tube. This analysis addresses the comprehensive checklist of equipment, apparel, and knowledge necessary for a safe and enjoyable experience. It investigates the material science differentiating various types of snow tubes, such as heavy-duty and PVC models, and their performance characteristics on different snow surfaces. A systematic approach to dressing, conceptualized as a seven-layer system, is detailed, focusing on thermal regulation, moisture management, and protection from the elements. The inquiry also covers essential safety accessories, including helmets and first-aid supplies, contextualizing their necessity through principles of physics and physiology. Furthermore, the article explores the environmental factors of snow conditions and terrain, the social dimension of tubing etiquette, and the logistical considerations of pre-trip planning. The objective is to provide a holistic framework for understanding what is needed for snow tubing, moving from equipment selection to responsible participation in the activity.
Key Takeaways
- Select a tube based on durability and use; heavy-duty models are best for longevity.
- Dress in multiple, specific layers for warmth, moisture control, and weather protection.
- Prioritize safety with a well-fitting helmet and appropriate protective eyewear.
- Understanding what you need for snow tubing includes knowing slope etiquette and safety rules.
- Check weather forecasts and tubing park conditions before you depart for the day.
- Pack high-energy snacks and water to stay fueled and hydrated on the slopes.
Table of Contents
- The Foundational Element: Selecting the Right Snow Tube
- Dressing for the Descent: The 7 Layers of Snow Tubing Apparel
- Beyond the Basics: Essential Safety and Comfort Accessories
- Understanding the Environment: Snow Conditions and Terrain
- The Etiquette and Rules of the Tubing Hill
- Pre-Trip Preparations: Ensuring a Smooth Experience
- Frequently Asked Questions (FAQ)
- Conclusion
- References
The Foundational Element: Selecting the Right Snow Tube
The immediate image conjured by snow tubing is one of simple, carefree joy—a person, a tube, and a snowy hill. Yet, the quality of that experience, its safety, and its sheer fun are profoundly influenced by the primary piece of equipment: the snow tube itself. The choice is not a trivial one. It is the interface between you and the snow, the vessel for your descent. Thinking about what you need for snow tubing begins with a thoughtful consideration of this object. The market offers a spectrum of options, and understanding their material composition, design, and intended use is the first step in responsible preparation. A tube is not just a round piece of plastic; it is an engineered product designed for a specific kind of stress, friction, and temperature. Let us consider the categories of tubes available and the rationale for choosing one over another.
Understanding the Physics of a Good Slide: Why Tube Choice Matters
At its core, a snow tube’s performance is governed by physics, specifically the coefficient of friction between the tube’s bottom surface and the snow. A lower coefficient of friction results in a faster, smoother ride. The material of the tube’s base is therefore a primary determinant of its performance. Hard, smooth plastics, often found on the bottom of heavy-duty snow tubes, are designed to minimize this friction, allowing for exhilarating speeds even on less-than-ideal snow. In contrast, a softer, more pliable material like standard PVC might create more drag, resulting in a slower, more controlled descent, which could be preferable for younger or more cautious riders.
The shape and inflation level also play a role. A properly inflated tube distributes the rider’s weight evenly, creating a stable platform. An underinflated tube may sag in the middle, increasing surface contact and friction, which slows the ride and can make steering nearly impossible. The design of the tube, including the depth of the center “donut hole” and the presence of handles, affects rider stability and control. A deeper seat offers a lower center of gravity, making the rider less likely to be ejected during a bumpy ride. Sturdy, well-placed handles are not a luxury; they are a point of connection and control, allowing the rider to adjust their body weight and absorb shocks.
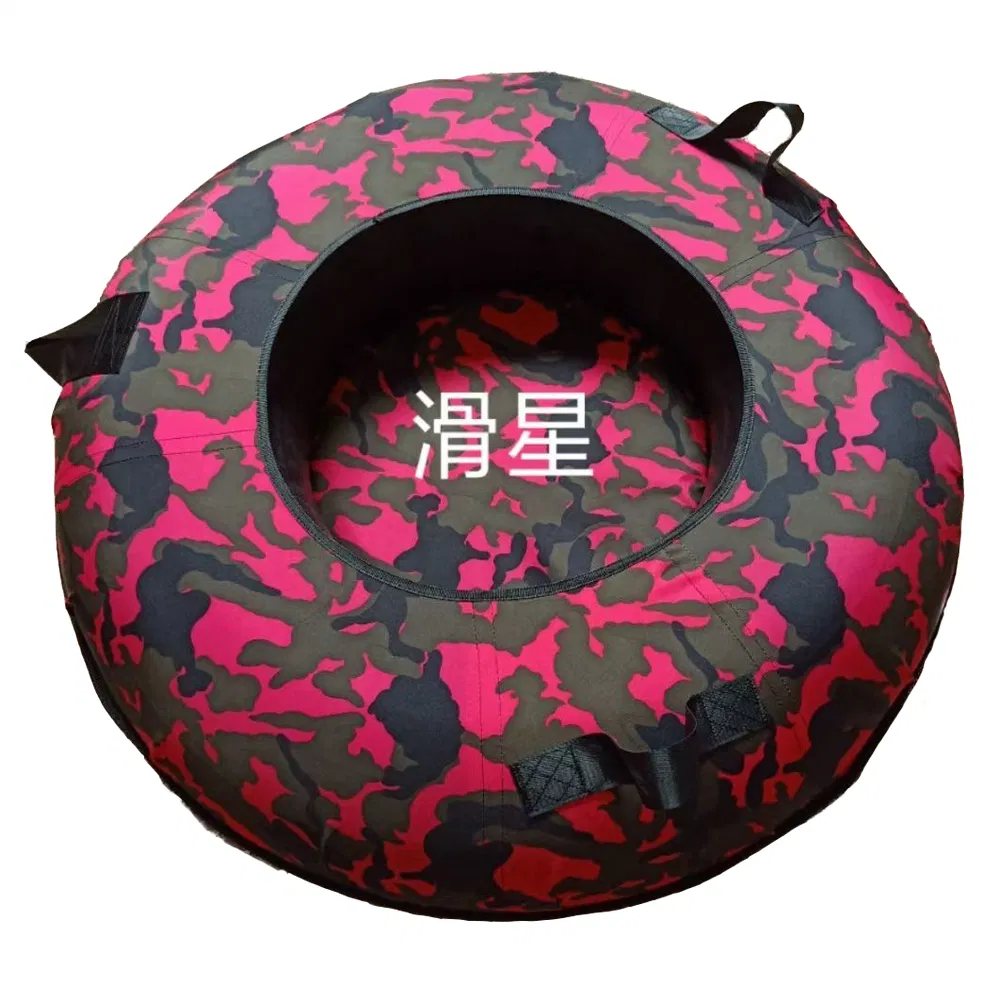
Heavy-Duty Snow Tubes: The Choice for Durability and Repeated Use
For the enthusiast who plans to make snow tubing a regular winter activity, or for those seeking the most robust and high-performance option, the heavy-duty snow tube is the superior choice. These are not the disposable toys of yesteryear. They are constructed with a focus on longevity and resilience. The top portion is typically made from a thick, durable nylon or polyester canvas, similar to what you might find on a high-quality backpack. This material is resistant to punctures, abrasions, and the degrading effects of UV light.
The most significant feature of a heavy-duty tube is its slick, hard-shell plastic bottom. This is often made from polyethylene (PE) or a similar polymer, chosen for its low-friction properties and its ability to withstand impacts with ice chunks or rough terrain. This hard bottom not only facilitates a faster ride but also protects the inner inflatable bladder from punctures from below. These tubes are an investment, but their lifespan far exceeds that of their simpler counterparts. When considering what you need for snow tubing for many winters to come, a heavy-duty model represents both economic sense and a commitment to performance. Exploring the variety of high-quality snow tubing products available can provide a clearer picture of the features that define a durable, long-lasting tube.
PVC Snow Tubes: A Look at Flexibility and Accessibility
Polyvinyl chloride (PVC) snow tubes represent a more accessible entry point into the sport. They are generally less expensive and lighter than heavy-duty models, making them easy to transport and store. These tubes are typically made entirely of PVC, which is a versatile and cost-effective plastic. The quality of PVC tubes can vary significantly, however. Thicker gauge PVC will be more resistant to punctures and cold-cracking, a phenomenon where the plastic becomes brittle and breaks in low temperatures. When selecting a PVC tube, it is wise to look for information on the material thickness or “gauge.”
PVC tubes are often brightly colored and feature appealing graphics, making them popular with families and casual users. While they may not offer the blistering speed of a hard-bottomed tube, they provide a classic and thoroughly enjoyable tubing experience. They are well-suited for gentle, well-groomed hills. Their main vulnerability is puncture risk. A sharp piece of ice, a hidden rock, or even a branch can end a day of fun prematurely. For this reason, many PVC tubes come with a patch kit. They serve their purpose well for occasional use or for those trying out the sport for the first time before committing to more expensive gear.
| Feature | Heavy-Duty Snow Tube | Standard PVC Snow Tube |
|---|---|---|
| Bottom Material | Hard, slick plastic (e.g., Polyethylene) | Polyvinyl Chloride (PVC) |
| Top Material | Heavy-duty nylon or polyester canvas | Polyvinyl Chloride (PVC) |
| Durability | High; resistant to punctures and abrasion | Moderate to Low; susceptible to punctures |
| Performance | Very fast slide due to low friction | Moderate speed; higher friction |
| Best For | Frequent use, enthusiasts, all snow conditions | Occasional use, families, groomed hills |
| Cost | Higher initial investment | Lower cost, more accessible |
| Lifespan | Multiple seasons with proper care | Often a single season or less |
Specialized Tubes: Towables and Multi-Person Options
The world of snow tubing also includes specialized designs for different experiences. Towable snow tubes, for instance, are often reinforced with extra-strong handles and a heavy-duty tow point attachment. These are designed to be pulled behind a snowmobile or ATV, an activity that requires specific safety precautions and should only be done in designated, safe areas by experienced operators. The construction of these tubes must be exceptionally robust to handle the lateral forces and higher speeds involved.
Multi-person tubes offer a shared experience, allowing two or more riders to descend the hill together. These larger tubes can be a source of great fun, but they also introduce different dynamics. Their increased mass can lead to higher speeds, and the combined, shifting weight of multiple riders can make the tube harder to control. When using a multi-person tube, communication between riders is helpful for balance, and it is doubly important to ensure the runout area at the bottom of the hill is completely clear before starting a descent. These specialized tubes expand the possibilities of the sport but also demand a heightened awareness of the unique physics and safety considerations they bring.
Dressing for the Descent: The 7 Layers of Snow Tubing Apparel
Proper attire is not about fashion; it is about function and survival. Being cold and wet is not merely uncomfortable; it can be dangerous, leading to conditions like frostbite or hypothermia (Centers for Disease Control and Prevention, 2022). The question of what you need for snow tubing is most critically answered in how you clothe your body. A common mistake is to simply wear the heaviest coat one owns. A far more effective approach is a system of layers. This allows you to adapt to changing conditions—the exertion of climbing a hill generates heat, while the rapid descent and wind chill cool you down. The 7-layer framework is a comprehensive way to think about dressing for warmth, dryness, and comfort.
Layer 1: The Base Layer – Managing Moisture and Core Temperature
The layer closest to your skin has the most important job: moisture management. As you play in the snow, you will sweat, even on the coldest days. If that moisture stays on your skin, it will chill you rapidly as it evaporates or cools. Cotton is a poor choice for a base layer because it absorbs moisture and holds it, becoming a cold, wet blanket against your body.
The proper base layer is made from materials that wick sweat away from the skin and move it to the outer surface of the fabric where it can evaporate. Merino wool is an excellent natural option; it is soft, breathable, naturally odor-resistant, and it continues to insulate even when damp. Synthetic alternatives, such as polyester or polypropylene, are also highly effective at wicking and are often more budget-friendly. A good set of thermal, long-sleeved top and bottom garments forms the foundation of your entire outfit.
Layer 2: The Mid-Layer – The Heart of Insulation
The mid-layer’s purpose is to trap your body heat. This layer creates an insulating pocket of warm air between the base layer and the outer shell. The thickness of your mid-layer can be adjusted based on the outside temperature. On a mildly cold day, a single fleece jacket or wool sweater might suffice. On a bitterly cold day, you might opt for a thicker fleece or even a lightweight down or synthetic-fill vest or jacket.
Fleece, made from polyethylene terephthalate (PET), is a popular choice because it is lightweight, breathable, and retains its insulating properties when wet. Wool remains a classic and effective insulator. Down provides the most warmth for its weight but loses its insulating ability completely when it gets wet, making it a riskier choice for an activity where you might end up covered in melting snow. A synthetic “puffy” jacket using materials like PrimaLoft or Thinsulate offers a good compromise, mimicking the warmth and compressibility of down while retaining insulation when damp.
Layer 3: The Outer Shell – Your Shield Against Wind and Water
Your outermost layer is your armor against the elements. It needs to be both waterproof and windproof. Snow tubing involves sitting in and sliding on snow, which means your pants, in particular, must be able to repel moisture. A soaking wet backside will quickly lead to a miserable and dangerously cold experience. Look for a jacket and pants made from materials with a waterproof/breathable membrane, such as Gore-Tex or a similar proprietary technology.
These membranes contain microscopic pores that are too small for liquid water droplets to pass through from the outside, but large enough for water vapor (your sweat, wicked out by your base layer) to escape from the inside. This breathability is what prevents you from feeling clammy and wet from your own perspiration. The outer shell should also be durable enough to withstand the abrasion of sliding and occasional tumbles. Features like sealed seams, waterproof zippers, and an adjustable hood on the jacket add extra protection.
| Layer | Primary Function | Recommended Materials |
|---|---|---|
| 1. Base Layer | Moisture Wicking | Merino Wool, Polyester, Polypropylene |
| 2. Mid-Layer | Insulation | Fleece, Wool, Synthetic Fill, Down |
| 3. Outer Shell | Waterproof & Windproof | Gore-Tex, eVent, or other waterproof/breathable fabrics |
| 4. Hands | Warmth & Waterproofing | Insulated, waterproof gloves or mittens |
| 5. Feet | Insulation & Dryness | Insulated, waterproof snow boots |
| 6. Head/Neck | Heat Retention & Wind Protection | Wool or fleece hat, balaclava, goggles |
| 7. Socks | Insulation & Moisture Wicking | Wool or synthetic ski/snowboard socks |
Layer 4: Protecting the Extremities – Waterproof Gloves or Mittens
Your hands are often in direct contact with the snow, whether you are holding onto your tube, bracing for a fall, or making a snowball. They are also highly susceptible to cold. Simple knit gloves will become soaked and useless in minutes. You need insulated, waterproof gloves or mittens.
Mittens are generally warmer than gloves because they keep your fingers together, sharing heat. Gloves offer better dexterity, which can be useful for zipping jackets or helping children. The choice is personal. Whichever you choose, look for a pair with a waterproof outer layer and a thick inner layer of insulation. A longer cuff that can be cinched tight over or under your jacket sleeve is a valuable feature, as it prevents snow from getting inside.
Layer 5: Footwear Fundamentals – Insulated, Waterproof Boots
Cold, wet feet can single-handedly ruin a day of winter fun. Your footwear is a critical component of what you need for snow tubing. Sneakers or fashion boots are completely inadequate. You need a pair of insulated, waterproof snow boots.
These boots combine a waterproof lower shell (often made of rubber) with an insulated upper (made of leather, nylon, or other durable materials). The insulation is rated by temperature, for example, down to -20°F (-29°C), giving you an idea of their performance. A good tread on the sole is also important for providing traction as you walk up and down slippery slopes. The height of the boot should be sufficient to prevent snow from tumbling in over the top.
Layer 6: Head and Neck Gear – The Role of Hats, Balaclavas, and Goggles
You lose a significant amount of body heat through your head. A warm hat made from fleece or wool is a simple but powerful piece of gear. On very cold or windy days, a balaclava or neck gaiter can provide additional protection for your face, neck, and ears. A balaclava covers the entire head and neck, with an opening for your eyes and sometimes your mouth, offering the most complete protection against windburn and frostbite.
Goggles serve a dual purpose. They protect your eyes from the wind, which can cause them to water and blur your vision during a fast descent. They also shield your eyes from the sun’s UV rays, which are stronger at altitude and reflect powerfully off the snow.
Layer 7: The Final Touch – Wool or Synthetic Socks
Just as with your base layer, cotton socks should be avoided. They will absorb sweat from your feet, get wet, and then make your feet cold, even inside the best boots. A single pair of well-made wool or synthetic ski/snowboard socks is the correct choice. These socks are designed to wick moisture, provide cushioning in key areas, and insulate without being overly bulky. You do not need to wear multiple pairs of socks; this can actually restrict circulation and make your feet colder. Trust one good pair to do the job.
Beyond the Basics: Essential Safety and Comfort Accessories
With the tube selected and the body properly attired, our inquiry into what you need for snow tubing turns to the accessories that enhance safety and comfort. These items are not always mandatory, but they represent a higher level of preparedness and a deeper respect for the potential risks of the activity. Engaging in any winter sport involves a calculation of risk, and these tools help to mitigate that risk, allowing for a more relaxed and secure experience.
Protective Headgear: The Non-Negotiable Helmet
In many winter sports, a cultural shift has occurred, moving the helmet from a niche item for professionals to standard equipment for all participants. Snow tubing should be no exception. While it may seem like a gentle activity, speeds can easily exceed 20-30 miles per hour. A collision with another person, a tree, or a patch of ice can happen unexpectedly. Furthermore, a rider can be ejected from a tube during a bumpy ride, leading to a direct impact of the head on a hard, icy surface.
A standard winter hat offers zero impact protection. A proper, certified snow sport helmet is designed to absorb and distribute the force of an impact, potentially preventing a serious head injury (Hagel et al., 2010). The helmet should fit snugly but comfortably, without rocking back and forth or side to side. Many tubing parks now require helmets for children, and some are making them mandatory for all riders. Even if not required, choosing to wear one is the single most impactful safety decision you can make.
Vision and UV Protection: The Function of Goggles and Sunglasses
The sun’s ultraviolet (UV) radiation increases with altitude, and snow reflects up to 80% of the sun’s UV rays, meaning you are being exposed from above and below. This can lead to a painful condition called photokeratitis, or sunburn of the cornea. On a bright, sunny day, sunglasses or goggles with 100% UV protection are indispensable.
Goggles offer more complete protection, especially from wind and blowing snow. During a high-speed descent, wind can cause your eyes to tear up, obscuring your vision at a moment when you need it most. Goggles create a seal around your eyes, providing a clear field of view. They come with different lens tints for various light conditions. An amber or rose-colored lens enhances contrast on overcast days, while a dark, mirrored lens is best for bright sun.
Sustenance on the Slopes: Hydration and High-Energy Snacks
The cold can suppress the sensation of thirst, but your body still loses water through breathing and perspiration. Dehydration can lead to fatigue, dizziness, and a decrease in your body’s ability to stay warm. It is wise to bring a water bottle or an insulated thermos with a warm drink.
Similarly, your body burns a tremendous number of calories to stay warm and to power your activity. Having high-energy snacks on hand can prevent a crash in energy levels. Items that are easy to eat with gloves on are ideal. Think granola bars, trail mix, or fruit leather. A small backpack can be used to carry these items, along with your water and any extra layers you might shed.
First-Aid Preparedness: Assembling a Compact Winter Kit
While commercial tubing parks will have their own first-aid stations, if you are tubing on a local hill, you are on your own. Even at a park, having a small personal kit for minor issues can save a trip to the lodge. A winter-specific kit should include standard items like adhesive bandages, antiseptic wipes, and pain relievers. It should also include items for cold-weather issues: blister treatment (moleskin), chemical hand warmer packets, and a small emergency blanket. Being able to address a small cut or a developing blister immediately can make the difference between continuing your day and having to end it early.
Understanding the Environment: Snow Conditions and Terrain
The experience of snow tubing is not a constant; it is a dynamic interaction between your equipment and the environment. The snow itself is a variable medium, and the shape of the land dictates the nature of the ride. A sophisticated understanding of what you need for snow tubing must include an ability to “read” the conditions. This knowledge allows you to anticipate how your tube will behave and to select appropriate terrain, ensuring both maximum fun and safety.
Natural vs. Artificial Snow: How Surface Affects Speed and Control
Many commercial tubing parks rely on snowmaking to ensure a consistent season. This artificial snow has a different character than natural snowfall. Snowmaking technology, as explained by sources like the Snow State guide, involves atomizing water into fine droplets and introducing them to cold air, often with the help of a nucleating agent, to form ice crystals (Snow State, n.d.). The result is typically a denser, wetter, and more durable snowpack.
For a tuber, this means the surface is often faster and icier than natural powder. A tube will accelerate more quickly on machine-groomed artificial snow. This can be exhilarating, but it also reduces the margin for error. Natural snow, especially fresh powder, has a higher coefficient of friction and acts as a cushion. It can create a slower, softer ride. Being aware of the type of snow you are on helps you manage your expectations for speed and the level of control you can exert. A reliable manufacturer like a professional snow tube supplier designs tubes that can perform well on a variety of surfaces, but the rider’s awareness remains key.
Reading the Terrain: Identifying Safe Slopes and Potential Hazards
The ideal tubing hill is long, wide, and has a gentle, consistent slope that gradually flattens out into a very long, clear runout area at the bottom. The runout is perhaps the most important safety feature of a hill; it is the braking zone. A hill that ends abruptly at a road, a parking lot, a forest, a river, or any other hazard is not a safe place to tube.
When assessing a non-commercial hill, walk the entire path of descent first. Look for hidden obstacles like rocks, tree stumps, or bare patches. Note any sudden drops or bumps that could launch a rider into the air unexpectedly. Pay attention to the sides of the run. Are there trees or other obstacles close to the path? A good tubing run has wide, clear margins. Also, consider the path back up the hill. Is there a safe place to walk that is separate from the downhill sliding lanes?
The Role of Temperature and “Wet Bulb” in Tubing Conditions
The temperature has a profound effect on snow conditions. When temperatures are well below freezing, the snow is dry and crystalline. As temperatures rise toward the freezing point (32°F or 0°C), the snow crystals begin to melt, creating a thin layer of water that can act as a lubricant, paradoxically making the snow faster. This is often referred to as “spring conditions.” If the temperature drops again after a partial melt, the snow can refreeze into a hard, icy crust, which is extremely fast and can be difficult and dangerous to tube on.
A more advanced concept used in snowmaking is “wet-bulb temperature,” which combines the ambient air temperature with the humidity. Low humidity allows for more evaporative cooling, meaning snow can sometimes be made even when the air temperature is slightly above freezing. For a tuber, understanding that humidity affects snow quality can be useful. A very dry, cold day will have different snow properties than a humid day near the freezing point.
Navigating Crowded Tubing Parks vs. Secluded Hills
A commercial tubing park offers many advantages: groomed lanes, a “magic carpet” lift to take you back up the hill, and staff to manage safety. However, they can also be crowded. The main challenge in a park is interacting safely with dozens of other riders. This involves waiting for the person ahead of you to clear the runout area and ensuring the lane is clear before you start.
Tubing on a secluded local hill offers freedom and tranquility but places all responsibility for safety on you and your group. There is no one to tell you when it is safe to go or to stop you from using a dangerous slope. This autonomy requires a higher level of judgment and self-regulation. Before heading out to a local spot, a full assessment of the terrain and conditions is not just a good idea; it is a moral responsibility to yourself and anyone with you.
The Etiquette and Rules of the Tubing Hill
Snow tubing, whether at an organized park or a local hill, is a communal activity. The safety and enjoyment of everyone on the slope depend on a shared understanding of basic rules and etiquette. These are not arbitrary regulations; they are practical procedures born from experience to prevent collisions and injuries. Cultivating an awareness of this social contract is a fundamental part of preparing for a day on the snow. It transforms a group of individuals into a well-functioning, safe community.
Right of Way: Understanding Downhill Traffic
The most fundamental rule of any gravity-powered slope sport is that the person downhill has the right of way. It is the responsibility of the person starting their descent to ensure the path below them is clear. This is because the person already in motion has limited control and cannot easily stop or change direction. Before you launch, scan the entire lane below you, including the runout area at the bottom. Only when it is completely clear is it safe to begin your slide. Never start a descent if there is any doubt about whether the person ahead has cleared the landing zone.
Creating a Safe Zone: Clearing the Landing Area
Once your ride comes to a stop in the runout area, your responsibility is to move out of the way as quickly as possible. The runout is the most dangerous place to linger. Another tuber is likely already on their way down, and they are counting on that space to slow down safely. As soon as you stop, get up, grab your tube, and walk to the side of the runout area. Never sit or wait for your friends in the middle of the landing zone. Look uphill as you are clearing the area to be aware of anyone coming down the slope.
Communicating with Fellow Tubers: Shouts and Signals
Clear communication can prevent accidents. If you see a potential hazard or someone who has fallen in the tubing lane, a loud shout of “Rider down!” or “Hold up!” can alert those at the top to wait. If you are at the top and your view of the runout is obstructed, you can agree on a signal with your group, such as a wave from the person at the bottom to indicate that the lane is clear. In a park setting, listen carefully to the instructions of the staff. They have a view of the entire hill and are there to orchestrate the safe flow of traffic.
Adherence to Park-Specific Rules and Operator Instructions
Every commercial tubing park has its own set of specific rules. These may include regulations on how to sit in the tube (e.g., no lying on your stomach), prohibitions on linking tubes together, or requirements for height and age. These rules are based on the specific characteristics of their hills and their insurance requirements. Read all posted signs and listen to the pre-tubing safety briefing. Arguing with or ignoring the staff is not only disrespectful but also endangers yourself and others. The staff are trained professionals whose primary job is to keep you safe. Trusting their expertise is part of the price of admission. The principles of respect and responsibility are values we hold dear as a company, and they extend to how we encourage our customers to enjoy the outdoors. You can learn more about our philosophy on our company information page.
Pre-Trip Preparations: Ensuring a Smooth Experience
The success of a snow tubing adventure is often determined before you even leave the house. Thoughtful preparation of your vehicle, your gear, and your plan for the day can prevent common frustrations and logistical problems, allowing you to focus on the fun once you arrive at the snow. This final phase of inquiry into what you need for snow tubing addresses the practical steps that bridge the gap between home and the hill.
Vehicle Readiness: Snow Tires, Chains, and Emergency Supplies
Traveling to a mountain or snowy area in winter requires that your vehicle is properly equipped. All-season tires can be inadequate in heavy snow or icy conditions. Vehicles with snow tires will have significantly better traction for braking and cornering. For two-wheel-drive cars in areas with serious winter conditions, carrying a set of tire chains and knowing how to install them is a necessity. Many mountain passes legally require you to carry chains during winter months.
Beyond tires, your vehicle should be prepared for winter travel. Ensure your windshield washer fluid is a de-icing formula that will not freeze. Check your antifreeze, battery, and wipers. It is also wise to keep a winter emergency kit in your car. This should include a shovel, an ice scraper, jumper cables, a flashlight, blankets, extra food and water, and a first-aid kit. Having a full tank of gas is also a good practice in case you are delayed by weather or traffic.
Checking Venue Status: Hours, Conditions, and Reservations
Before you load up the car, check the status of your destination. If you are going to a commercial tubing park, visit their website or call their snow phone. Confirm their hours of operation. Check the current snow report and weather forecast. Some parks may close due to extreme weather (like high winds or rain) or poor conditions.
In the modern era, many popular tubing parks require advance reservations, especially on weekends and holidays. Tubing sessions are often sold in timed blocks (e.g., a 2-hour session) and can sell out days or weeks in advance. Showing up without a reservation could lead to disappointment. Check their policy on tickets and book online if necessary. This also gives you a chance to fill out any required liability waivers online, saving time upon arrival.
Inflating and Inspecting Your Tube Before You Go
If you own your own snow tube, it is best to inflate and inspect it at home before you leave. Inflate it to a firm, but not rock-hard, pressure. Leave it for an hour or so to check for slow leaks. A leak that is barely noticeable at home can become a major problem in the cold, as the air inside the tube will contract and lower the pressure further. Inspect the entire surface, especially the bottom, for any signs of damage, deep scratches, or punctures. Check that the handles are securely attached. Finding a problem at home gives you a chance to patch it or make other arrangements. Finding a problem at the top of the tubing hill is a day-ender.
Planning Your Route and Informing Others of Your Itinerary
Plan your driving route in advance, and check for any road closures or chain controls before you depart. GPS apps are useful, but it is wise to have a backup plan or even a physical map, as cell service can be unreliable in mountainous areas. Allow for extra travel time; winter driving is slower and less predictable than summer driving.
Finally, especially if you are heading to a more remote, non-commercial area, let someone know your plan. Tell a friend or family member where you are going, what route you are taking, and when you expect to be back. This is a basic safety protocol for any outdoor adventure. If you run into trouble and do not return on time, someone will know where to start looking for you.
Frequently Asked Questions (FAQ)
What is the minimum age for a child to go snow tubing?
This often depends on the policy of the specific tubing park. Many parks have a minimum height requirement (e.g., 42 inches) rather than an age limit, as height is a better indicator of whether a child can safely fit in the tube. For tubing on local hills, it is a matter of parental judgment, but children should be old enough to hold on securely and understand basic safety instructions.
Can I use a river or pool float for snow tubing?
No, you should not. Plastics used for pool floats are not designed for cold temperatures. They become brittle and can easily crack or shatter in the cold, offering no durability. They also lack the slick, reinforced bottom needed for sliding on snow and are highly susceptible to punctures from ice or debris.
How do you stop or steer a snow tube?
Snow tubes offer very limited steering and no braking. You can try to drag your hands or feet to slow down or influence your direction slightly, but this is not very effective and can lead to spinning. The primary method of “stopping” is a long, flat runout area at the bottom of the hill that allows you to slow down naturally due to friction.
Is it better to rent a snow tube or buy one?
If you plan to go snow tubing only once or twice, renting at a commercial park is convenient and cost-effective. If you plan to make it a regular winter activity or want to use local hills, buying your own high-quality, heavy-duty snow tube is a better long-term investment.
What should I do if I fall out of my tube mid-run?
If you fall out, your first priority is to avoid the path of anyone coming down behind you. If possible, try to move quickly to the side of the tubing lane. If you cannot move immediately, lie flat and cover your head with your arms until you can assess that it is safe to get up.
Are there weight limits for snow tubes?
Yes, most snow tubes have a manufacturer-recommended weight limit. A standard single-person tube might have a limit of around 200-250 pounds. Heavy-duty and multi-person tubes will have higher limits. It is important to respect these limits for both safety and the longevity of the tube.
Can I wear jeans for snow tubing?
It is strongly advised not to wear jeans. Denim is made of cotton, which absorbs moisture readily and takes a very long time to dry. Once your jeans get wet from the snow, they will draw heat away from your body, making you extremely cold and uncomfortable. Waterproof snow pants are the correct choice.
Conclusion
The pursuit of snow tubing, in its most fulfilling form, emerges from a thoughtful and deliberate process of preparation. It is an activity that promises simple, exhilarating joy, yet the realization of that promise is contingent upon a foundation of knowledge and foresight. We have seen that the question of what you need for snow tubing is answered not by a single item, but by a system of interlocking components: the carefully selected tube, the intelligently layered apparel, the essential safety accessories, and an informed awareness of the environment and the community of fellow riders. The selection of a durable, appropriate tube sets the stage for performance and longevity. The methodical layering of clothing serves as a personal climate control system, defending against the cold while managing the heat of exertion. Helmets, goggles, and other accessories are not impediments to fun but are the very tools that enable a more profound sense of freedom by mitigating risk. By understanding the nuances of snow conditions, respecting the topography of the land, adhering to the shared etiquette of the hill, and completing the logistical preparations for the journey, the tuber is no longer a passive participant subject to the whims of the environment. Instead, they become an active, responsible agent, fully equipped to engage with the winter landscape safely and joyfully. This comprehensive preparation is not a chore to be endured, but rather the first, most critical act of the adventure itself.
References
Centers for Disease Control and Prevention. (2022). Preventing hypothermia & frostbite. Winter Weather.
Hagel, B. E., Pless, I. B., Goulet, C., Platt, R. W., & Robitaille, Y. (2010). The effect of helmet use on injury and hospital admission in a cohort of skiers and snowboarders. Epidemiology, 21(4), 519–525. https://doi.org/10.1097/EDE.0b013e3181df9123
Snow State. (n.d.). The science of snowmaking. Retrieved December 5, 2024