A Practical Guide: How to Make a Flood Barrier & Avoid 5 Critical Mistakes
septiembre 15, 2025
Abstract
The increasing frequency and intensity of flooding events globally necessitate a greater public understanding of proactive property protection measures. This document provides a detailed examination of the principles and practices involved in constructing effective temporary flood barriers. It analyzes the critical preliminary steps of site assessment and risk evaluation, which inform the selection of an appropriate barrier type. A comparative analysis of various barrier systems is presented, evaluating traditional sandbags against modern alternatives such as water-filled, air-filled, and soil-filled structures. The text offers a methodological guide to the construction process, emphasizing common points of failure like improper foundation preparation, incorrect stacking techniques, and the neglect of seepage pathways. It addresses the complete lifecycle of flood defense, from initial planning and deployment to the safe removal and disposal of barrier materials post-event. The objective is to equip homeowners and property managers with the necessary knowledge to make informed decisions and execute a competent flood defense strategy, thereby mitigating potential water damage and enhancing resilience against hydrological hazards.
Key Takeaways
- Assess your property’s specific flood risk before choosing a defense strategy.
- Select the right barrier type by comparing weight, cost, deployment speed, and height.
- Properly preparing the ground is fundamental to preventing barrier failure from seepage.
- Learn how to make a flood barrier by correctly stacking and sealing it against leaks.
- Do not overlook sealing weak points like doors, windows, and utility penetrations.
- Plan for the safe removal and disposal of barrier materials after the floodwaters recede.
- Consider modern, reusable options over traditional, single-use sandbags.
Table of Contents
- A Practical Guide: How to Make a Flood Barrier & Avoid 5 Critical Mistakes
- Mistake 1: Underestimating the Threat & Failing to Plan
- Mistake 2: Choosing an Inappropriate Barrier for Your Situation
- Mistake 3: Improper Construction and Flawed Installation
- Mistake 4: Neglecting Vulnerable Points and Seepage Paths
- Mistake 5: Forgetting About Post-Flood Management and Safety
- Frequently Asked Questions
- Conclusión
- References
A Practical Guide: How to Make a Flood Barrier & Avoid 5 Critical Mistakes
The quiet dread that accompanies a forecast of heavy, sustained rain or a rapidly swelling river is a feeling familiar to a growing number of people. In 2025, the reality of climate change has rendered flood risk a tangible concern for communities once thought safe. The question is no longer if water will rise, but when and by how much. Faced with this reality, the capacity for self-protection becomes not just a practical skill but a profound source of security and agency. The impulse to shield one’s home, the repository of memories and the center of family life, is a deeply human one. Yet, action without knowledge can lead to a false sense of security and, ultimately, heartbreaking failure.
Constructing a flood defense is a task of applied physics and meticulous labor. It is a dialogue with the forces of nature, where water, patient and powerful, will exploit any weakness. This guide is conceived as a form of instruction, a patient walkthrough of the concepts and actions needed to erect a barrier that holds. We will move from the abstract to the concrete, from understanding the character of your specific flood threat to the physical techniques of building a wall against it. We will also confront the common errors—the five critical mistakes that turn well-intentioned efforts into futile gestures. By understanding these pitfalls, you can learn how to make a flood barrier that not only stands but protects.
Mistake 1: Underestimating the Threat & Failing to Plan
The most fundamental error in flood defense occurs before a single sandbag is filled or a barrier panel is unfurled. It is a failure of imagination and intellect: the underestimation of the water’s potential and the absence of a coherent plan. A barrier erected in panic during a downpour is often a barrier destined to fail. Effective protection begins with sober, clear-eyed assessment during calm, dry weather.
Understanding Your Specific Flood Risk
To defend against an adversary, you must first understand its nature. Floods are not a monolithic phenomenon; they possess different characteristics depending on their origin. Think of it as knowing whether you are facing a slow, steady siege or a rapid, overwhelming assault.
- Fluvial (River) Floods: These occur when a river or stream overflows its banks. They are often predictable, with weather services issuing warnings days in advance as water levels rise upstream. The rise can be slow and steady, giving you time to prepare. The key data points you need are the historical flood crests in your area and the projected height for the incoming event. Your barrier must be built higher than this projected crest, with an added margin for safety, often called “freeboard.”
- Pluvial (Surface Water) Floods: These are the product of intense, overwhelming rainfall that saturates the ground and overwhelms local drainage systems. They can happen anywhere, even in areas far from a body of water. Pluvial floods are characterized by their rapid onset and are often localized, affecting one street but not the next. The challenge here is identifying the low points on your property where water will naturally collect and the overland flow paths it will follow. Your barrier strategy will be less about holding back a single large body of water and more about diverting flowing surface water away from your home’s foundation.
- Coastal Floods: Driven by storm surges from hurricanes and other major coastal storms, these floods combine high tides with powerful waves. They represent an immense force, exerting both hydrostatic pressure (the weight of standing water) and hydrodynamic forces (the impact of moving waves). Defending against a significant coastal surge is often beyond the scope of temporary household barriers and requires community-level infrastructure or permanent, engineered solutions for the home.
To begin your assessment, consult resources like the Federal Emergency Management Agency (FEMA) flood maps in the United States or equivalent government environmental agencies in Europe and Asia. These maps will tell you if your property is in a designated flood zone and the statistical probability of a flood occurring. But do not stop there. Walk your property. Use a simple line level or a laser level to understand its topography. Where is the lowest point of your foundation? Where would water enter first? Answering these questions is the first step in knowing how to make a flood barrier that is positioned for success.
Developing a Flood Emergency Plan
A plan transforms panicked reaction into purposeful action. Your Flood Emergency Plan (FEP) is a document and a set of rehearsed procedures for your household. It should be written down and accessible.
It must answer several questions:
- What is the trigger for deployment? At what specific flood watch, warning level, or predicted water height will you begin to build your barrier? Waiting too long is a common and disastrous error.
- What materials are needed? Do you have them on hand? This includes the barriers themselves, shovels, plastic sheeting, sealant, and personal protective equipment like gloves and boots. If you rely on sandbags, do you have a local source for sand identified in advance?
- Who is responsible for what? Assign roles. Who gathers the tools? Who begins filling bags or deploying panels? Who is responsible for sealing doors and vents? In a stressful situation, clear roles prevent confusion.
- How long will it take? Realistically time how long it takes to deploy your chosen barrier system. Practice it. Building a 25-foot long, 2-foot high sandbag wall can take two people several hours. You must factor this deployment time into your trigger point.
- What is the evacuation plan? A flood barrier is a tool for property protection, not a guarantee of personal safety. Your plan must include a clear, non-negotiable trigger for evacuating the premises, regardless of how secure you believe your barrier to be.
This planning phase is an exercise in foresight. It is the quiet, diligent work that makes effective action possible when the storm arrives.
Mistake 2: Choosing an Inappropriate Barrier for Your Situation
Once you understand the nature of the threat, the next critical decision is selecting your weapon. The classic image of flood fighting is the sandbag, and while it remains a viable option, the technology of flood defense has advanced considerably. Choosing the wrong type of barrier for your specific needs, budget, and physical capabilities is a frequent mistake that can compromise your entire defense. The ideal barrier is one that you can deploy quickly, safely, and effectively before the water arrives.
The Enduring Sandbag: Pros and Cons
Sandbags are the traditional, time-tested method of temporary flood defense. Their effectiveness is contingent on their correct use, which is far more labor-intensive than most people realize.
- How They Work: Sandbags function primarily through their weight and mass. A properly constructed sandbag wall creates a dense, heavy barrier that resists the pressure of standing water. They are not waterproof; the bags are made of porous material (typically burlap or polypropylene). Their effectiveness comes from stacking them in an interlocking pattern and, ideally, using a layer of plastic sheeting on the flood-facing side to create a waterproof seal.
- Advantages: The primary advantage of sandbags is their low material cost and widespread availability. The components—bags and sand—are relatively inexpensive and can be sourced in most locations. They are also highly adaptable, allowing you to build a wall that conforms to uneven ground and curves around obstacles.
- Disadvantages: The disadvantages are significant. They are incredibly labor-intensive. Filling, transporting, and placing enough sandbags to protect even a small home is a monumental physical task requiring a team of able-bodied people. They are also slow to deploy. After a flood, the sandbags are contaminated with floodwater (which can contain sewage, chemicals, and bacteria) and present a biohazardous disposal problem. They are a single-use solution.
Modern Alternatives: A Comparative Look
In recent years, a variety of engineered temporary flood barriers have become available, offering significant advantages in deployment speed and reusability. These modern solutions often represent a higher initial investment but can be more effective and economical over the long term, especially for properties with recurring flood risk. Many homeowners are now exploring various flood prevention barrier solutions to find a system that best fits their needs.
Here is a comparison of common types:
| Barrier Type | Deployment Speed | Labor Required | Reusability | Cost (Initial) |
|---|---|---|---|---|
| Sandbags | Very Slow | Very High | No | Low |
| Water-Filled Barriers | Fast | Low-Moderate | Yes | Moderate-High |
| Inflatable Barriers | Very Fast | Low | Yes | High |
| Modular Barriers | Moderate | Moderate | Yes | Very High |
| Soil-Filled Barriers | Slow | High (Machinery) | Semi-Permanent | High |
Deep Dive into Modern Barrier Types
Water-Filled Barriers
These are a popular alternative to sandbags. They typically consist of large tubes or bladders made from durable PVC or a similar industrial-grade plastic. You position the empty barriers and then fill them with a readily available resource: water, often the floodwater itself.
- How They Work: Like sandbags, they work on the principle of weight. A large tube filled with water is immensely heavy and stable. As the external floodwater rises, its pressure pushes down on the barrier, creating an even better seal with the ground. This clever use of physics is what makes them so effective (Flood Defense Group, 2025).
- Advantages: Their key advantage is rapid deployment. Laying out the empty tubes is far faster than stacking sandbags. Filling them with pumps is also quick. They are reusable, requiring only to be drained, cleaned, and stored. They conform well to moderately uneven surfaces.
- Disadvantages: They require a relatively flat surface for the best seal and can be punctured by sharp debris, although professional-grade models are extremely tough. The initial cost is higher than for sandbags.
Inflatable Barriers
Also known as inflatable dams, these barriers are another rapid-deployment option. Some are filled with air, while others are ingeniously designed to fill with the rising floodwater itself.
- How They Work: An air-filled barrier is simply a large inflatable tube that acts as a dam. A self-inflating water barrier has internal baffles; as floodwater enters the base, it lifts the barrier into its defensive position. The weight of the water on the “foot” of the barrier holds it in place (TRDSF, 2024).
- Advantages: They are perhaps the fastest systems to deploy, making them ideal for flash flood scenarios. They are lightweight to transport and store (floods-barrier.com).
- Disadvantages: They can be among the most expensive options and are highly dependent on the integrity of their material. A puncture can lead to catastrophic failure, making them less suitable for areas with fast-flowing water carrying heavy debris.
Soil-Filled and Modular Barriers
For larger-scale or semi-permanent needs, other systems exist.
- HESCO Barriers: Originally designed for military fortifications, these are collapsible wire mesh containers with a heavy-duty fabric liner. On-site, they are opened up and filled with soil, sand, or gravel, typically using heavy machinery like a front-end loader. They create an exceptionally robust, gravity-based wall (). While incredibly effective, their logistical requirements put them beyond the scope of most individual homeowners, being better suited for community or commercial protection. Modifications can even be made to fill them with rock to prevent scouring and erosion at the base (Flood Defense Group, 2023).
- Modular Barriers: These systems consist of interlocking panels, frames, and supports made of aluminum or high-strength plastic. They are assembled on-site to form a rigid flood wall. They are highly effective and can be built to significant heights. However, they are expensive, require a prepared, flat surface, and can be more complex to assemble under pressure than a water-filled system.
Choosing the right barrier is a balancing act. You must weigh the cost against the speed of deployment, the labor you have available, and the nature of your flood risk. For many, a reusable system like a water-filled barrier presents the most practical and reliable long-term solution.
Mistake 3: Improper Construction and Flawed Installation
Having the right materials is only half the battle. A flood barrier, whether made of simple sandbags or advanced composite panels, is a system. Its strength is determined by its weakest point. Flaws in construction and installation are the most common reason that barriers fail, turning hours of hard work into a tragic spectacle of water seeping, then flowing, then pouring through the defenses. The process of how to make a flood barrier is one of precision and technique.
The Critical Foundation: Ground Preparation
Imagine building a house on a foundation of soft mud. It would be doomed from the start. The same principle applies to a flood barrier. Water will not be stopped by the barrier alone; it will be stopped by the combination of the barrier and the seal it makes with the ground.
- Clear the Area: The first step is to remove everything from the path where the barrier will sit. This includes rocks, sticks, mulch, decorative stones, and even thick grass. Any object left under the barrier creates a potential channel for water to flow through. Scrape the area down to bare, firm soil if possible.
- Level the Surface: The flatter the ground, the better the seal. For a sandbag wall, you can dig a small trench, about one bag wide and half a bag deep. This “keying in” helps lock the first course of bags to the ground. For water-filled or modular barriers, an even surface is paramount. Small depressions should be filled and compacted.
- The Impermeable Membrane: This is a step many novices skip, and it is a fatal error, especially with sandbags. Sandbags are porous and will leak. To create a truly waterproof barrier, you must lay down a sheet of heavy-duty plastic (at least 6-mil thickness) before placing your first bags. This sheeting should extend from the base of the barrier up the “dry” side, over the top, and down the “wet” side, with several feet of excess on the ground facing the floodwater. The weight of the water on this plastic flap will press it into the ground, creating a powerful seal.
The Art and Science of Stacking Sandbags
If you choose to use sandbags, you must build a wall, not just a pile. There is a proven methodology that maximizes strength and stability.
| Step | Action | Rationale |
|---|---|---|
| 1. Filling | Fill bags only 1/2 to 2/3 full. Tie the top high up on the bag. | Overfilled bags are round and rigid, leaving large gaps. Underfilled bags are flat and malleable, allowing them to mold together tightly. |
| 2. Placement | Lay the first course of bags lengthwise, parallel to the direction of the water flow, in your prepared trench. | This creates a solid, continuous base layer. |
| 3. Compaction | Walk on each bag after placing it to flatten it and force it to conform to the bag next to it. | This removes gaps and compacts the fill material, increasing the wall’s density and stability. |
| 4. Stacking | Lay subsequent courses like bricks in a wall. The joints between bags in one layer should be centered over the bags in the layer below. | This interlocking pattern distributes pressure evenly and prevents the wall from collapsing. |
| 5. Pyramid Shape | Build the wall with a base that is at least three times wider than its height. For a 2-foot high wall, the base should be 6 feet wide. | This triangular, or pyramid, shape provides the necessary weight and stability to resist the immense force of the water. A thin, vertical wall will be pushed over easily. |
| 6. Sealing | Once the wall is built, drape your plastic sheeting over it. Place a final row of sandbags on the plastic flap on the “wet” side to hold it down securely. | The plastic is the actual waterproofing layer. The sandbags are the structure that holds the plastic in place. |
This process is slow and demanding. Each step is vital. Rushing the process, taking shortcuts by not compacting bags, or building a wall that is too steep and narrow are invitations to failure.
Deploying Modern Barriers
While modern systems are simpler, they are not foolproof. The manufacturer’s instructions are not mere suggestions; they are the blueprint for success.
- For Water-Filled Barriers: Ensure the fill ports are accessible and you have the correct hose fittings and a pump with adequate capacity. As the barrier fills, walk along its length to ensure it is not snagged and is unrolling correctly. Do not under-fill the barrier; it needs its full design weight to be stable.
- For Modular Barriers: Pay meticulous attention to how the panels connect and how the seals or gaskets seat between them. Ensure all locking mechanisms are fully engaged. The bracing system that supports the wall from the dry side is especially important; it must be placed on firm ground and installed exactly as specified.
The construction phase is where planning meets reality. It requires diligence, an eye for detail, and a respect for the power of the water you are trying to hold back.
Mistake 4: Neglecting Vulnerable Points and Seepage Paths
A common and heartbreaking scenario in a flood is a homeowner standing behind a well-built flood barrier, only to watch in horror as water bubbles up from the floor drains or pours in through a low-lying window well. A flood defense system is only as strong as its weakest link. Building a perimeter wall is the primary task, but it is not the only one. You must identify and seal all the subtle, often-forgotten pathways that water can take to bypass your main defense.
The Problem of Backflow and Seepage
Water does not only push against your property from the outside; it can also come up from below and through your own plumbing.
- Sewer Backflow: During a major flood, municipal sewer systems can be overwhelmed. The immense volume of floodwater and stormwater enters the pipes, pressurizes the system, and seeks an escape route. The lowest points are often the drains in your home: basement floor drains, toilets, showers, and sinks. This results in not just water, but raw sewage backing up into your house.
- Solution: Install backflow prevention valves. These are devices fitted to your main sewer line that allow waste to flow out but automatically close to prevent anything from flowing back in. There are several types, and installation is a job for a qualified plumber, but it is one of the most important permanent flood-proofing measures you can take. For a last-minute defense, you can try to plug drains, but this is often ineffective against the high pressure of a surcharged sewer system.
- Groundwater Seepage: As the ground outside becomes saturated, the hydrostatic pressure in the soil increases dramatically. This pressure will force water through any crack or joint in your foundation walls or slab. It can turn a dry basement into a swimming pool even if no water overtops your external barriers.
- Solution: A sump pump is the primary defense against this. A sump pump sits in a pit constructed at the lowest point of your basement or crawlspace. As water collects in the pit, a float switch activates the pump, which ejects the water to the outside, away from the foundation. The crucial element here is a reliable power source. Since power outages are common during floods, your primary sump pump must be supplemented with a battery backup system or a secondary water-powered pump that runs on your home’s municipal water pressure.
Sealing Doors, Windows, and Penetrations
Your home’s walls are not a solid, monolithic surface. They are punctuated by doors, windows, vents, and utility lines. Each of these is a potential point of failure.
- Doors and Garage Doors: Standard doors are not waterproof. Water will easily push past weather stripping. Large garage doors are particularly vulnerable, as they can buckle under water pressure.
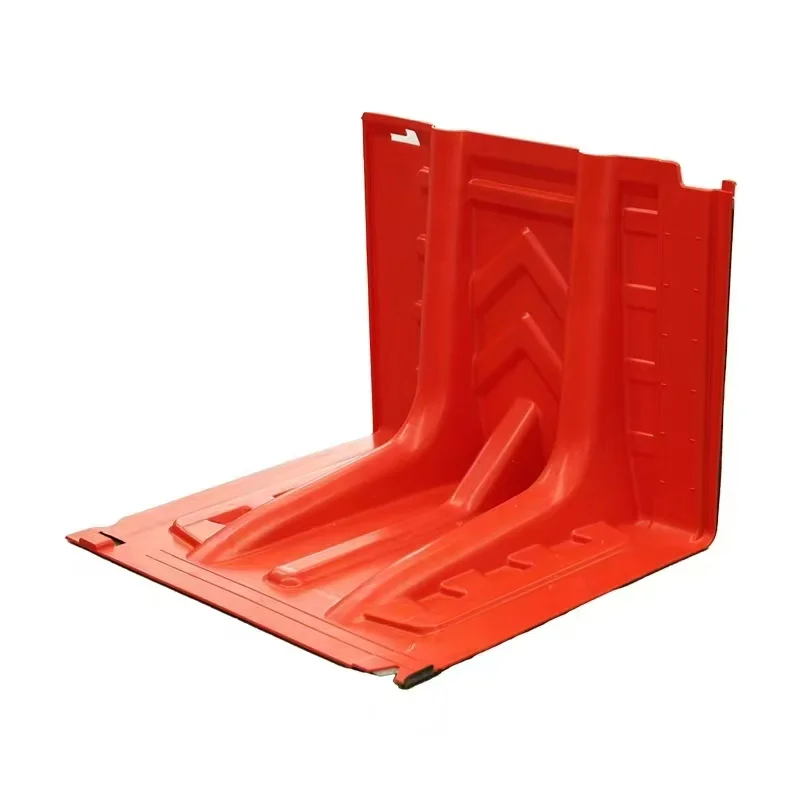
- Solutions: One approach is to incorporate these openings into your main barrier plan, building your sandbag or other barrier wall several feet out from the door. A more targeted approach involves using specialized door barriers. These can range from removable panels that are braced against the door frame to inflatable systems that seal the opening. For example, specialized flood prevention baffles for entryways can offer a rapid and effective seal for standard doorways. At a minimum, you can use heavy plastic sheeting and duct tape, braced with plywood, but this is a last-resort measure with a high risk of failure.
- Low Windows and Vents: Basement windows, window wells, and vents for dryers or furnaces are often at or below ground level. They are direct conduits for floodwater.
- Solutions: Window wells can be protected by building a barrier around them or by installing a secure, waterproof window well cover. Vents and other openings can be temporarily sealed. Use thick plywood cut to size and sealed against the wall with a high-quality silicone caulk or specialized sealant tape. Expanding foam can also be used to fill gaps, but be aware that it can be difficult to remove later.
The process of “total sealing” requires you to think like water. Get on your hands and knees and inspect your entire foundation. Where does the cable TV line enter? Where is the outdoor water spigot? Every one of these penetrations must be addressed. This meticulous, detail-oriented work is what distinguishes a successful defense from a failed one.
Mistake 5: Forgetting About Post-Flood Management and Safety
The moment the floodwaters begin to recede is not a moment of final victory, but the beginning of a new and equally challenging phase. The water may be gone, but the danger is not. Contamination, structural risks, and the sheer logistical challenge of cleanup present significant hurdles. A failure to plan for the post-flood period can lead to health problems, further property damage, and unnecessary stress.
The Dangers Lurking in Flood Debris
The water that inundated your property was not clean. It was a toxic soup of everything it flowed over and through: soil, chemicals from lawns and roadways, fuel, and often, raw sewage. Everything the water touched is now contaminated.
- Contaminated Barriers: Your flood barriers, especially sandbags, are now biohazards. The fabric and sand are saturated with bacteria, viruses, and chemical contaminants. They cannot simply be dumped or the sand used in a playground.
- Disposal: You must treat them as hazardous waste. Wear waterproof gloves and boots, and ideally a mask, when handling them. Check with your local public works or emergency management department for instructions on proper disposal. Often, communities will set up designated collection sites for used sandbags. Do not store wet, used sandbags, as they will become a breeding ground for mold and dangerous bacteria. Reusable barriers like water-filled tubes must be thoroughly cleaned and disinfected with a bleach solution according to the manufacturer’s instructions before being stored.
- Structural and Electrical Hazards: The flood has put immense stress on your property.
- Before Re-entry: Do not rush back into your home. Check for visible structural damage from the outside—cracked foundations, shifted walls, or sagging roofs. The single most important immediate danger inside a flooded building is electricity. If the main breaker was not shut off before the flood, assume all electrical circuits are live and the water on the floor could be energized. Do not enter standing water. Wait for a qualified electrician to inspect the system and declare it safe.
- Gas Leaks: Natural gas or propane lines may also have been damaged. If you smell gas, leave the area immediately and call the utility company from a safe distance.
The Recovery and Restoration Process
Once the property is declared safe to enter, the recovery work begins. The goal is to dry everything out as quickly as possible to prevent the growth of mold, which can begin within 24-48 hours.
- Document Everything: Before you move or throw anything away, document the damage for your insurance claim. Take extensive photos and videos of every room, every damaged object, and the high-water marks on the walls.
- Remove Water and Saturated Items: Use pumps or shop vacuums to remove any remaining standing water. Tear out and discard everything that was saturated by floodwater and cannot be professionally cleaned and disinfected. This includes carpets, carpet padding, drywall, insulation, mattresses, and upholstered furniture. It is a painful but necessary process to prevent long-term mold infestation.
- Dry and Dehumidify: Open all windows and doors to promote air circulation. Use high-volume fans and dehumidifiers running constantly to dry out the structural wood and concrete. This process can take weeks.
- Clean and Disinfect: All remaining surfaces that came into contact with floodwater must be cleaned and then disinfected with a solution of one part household bleach to ten parts water.
Planning for this phase before the flood is part of a complete strategy. Have the contact information for your insurance agent, a plumber, an electrician, and a flood restoration company in your emergency plan. Knowing who to call will save you precious time and allow you to begin the difficult journey to recovery on the right foot.
Frequently Asked Questions
How high should I build my flood barrier?
Your barrier should be built at least 20% higher than the projected flood crest. For example, if a 3-foot flood is predicted, your barrier should be at least 3.6 feet high. This “freeboard” accounts for waves and unexpected surges. Always consult official flood projections from sources like the National Weather Service.
Can I use dirt instead of sand in sandbags?
Sand is the preferred material because its particles are coarse and angular, which helps them interlock and allows water to slowly seep in, adding weight. Soil, especially with high clay content, can become slick and unstable when wet. If dirt is your only option, be aware that the bags will be heavier and may not perform as well.
How do I protect a garage door from flooding?
Garage doors are a major weak point. The best protection comes from specialized garage door flood barriers that brace against the opening. A less expensive but labor-intensive option is to build your main sandbag or other temporary barrier several feet in front of the garage door, creating a protected space.
Are water-filled flood barriers reusable?
Yes, one of the primary advantages of water-filled barriers is their reusability. After a flood, they are drained, cleaned according to the manufacturer’s instructions to remove contaminants, dried, and then rolled up for storage. This makes their higher initial cost more economical over time for properties with repeated flood risk.
What is the biggest mistake people make when building a flood barrier?
The most common and critical mistake is waiting too long to start. Building a proper flood defense takes significant time and labor. By the time the water is visibly rising, it is often too late to construct an effective barrier. A well-thought-out flood plan with clear action triggers is essential.
How do I stop water from coming up through my floor drain?
This is caused by sewer backflow. The most reliable solution is to have a plumber install a backwater prevention valve on your main sewer line. As a temporary, last-minute measure, you can try inserting an inflatable plug into the drainpipe, but this may not hold against significant pressure.
Can I make a flood barrier out of wood?
A plywood barrier can work for very shallow water (under 2 feet) if it is extremely well-braced. You would need to build a sturdy wooden frame and anchor it to the ground and the building. The key challenge is creating a waterproof seal at the bottom and along the sides, which typically requires sealant, gaskets, and plastic sheeting. It is a complex DIY project with a high potential for failure if not engineered correctly.
How much sand do I need for a sandbag wall?
A general rule of thumb is that it takes about 1 cubic yard of sand to fill 75 sandbags (35-40 lbs each). To build a 3-foot-high, 20-foot-long wall (which requires a 9-foot-wide base in a pyramid shape), you would need approximately 1,600 sandbags, which translates to over 21 cubic yards of sand. The labor and material requirements are immense.
Is it safe to stay in my house behind a flood barrier?
While a well-built barrier can protect your property, it is not a fortress. Conditions can change rapidly, barriers can be overtopped or fail unexpectedly, and emergency services may not be able to reach you. Always follow the evacuation orders of local officials. Your personal safety is more important than your property.
Where is the best place to store a reusable flood barrier?
Store your reusable barrier in a location that is dry, protected from direct sunlight (which can degrade materials over time), and easily accessible. A garage, shed, or basement is ideal, as long as it is not in an area that would be the first to flood. Ensure you can get the barrier out quickly when you need it.
Conclusión
The confrontation with rising water is a primal one, pitting human ingenuity against the indifferent power of nature. We have seen that success in this contest is not born of frantic, last-minute effort. It is the result of careful thought, meticulous preparation, and a deep respect for the forces at play. The process of how to make a flood barrier effectively begins not with a shovel, but with knowledge: an understanding of your landscape, an awareness of the different forms a flood can take, and a clear plan of action.
We have traversed the critical mistakes that undermine so many attempts at flood defense—from underestimating the threat and choosing the wrong tools, to the subtle but fatal errors in construction and the neglect of hidden vulnerabilities. Building a wall with a proper foundation, a stable structure, and a waterproof seal is a science. Recognizing and sealing the pathways through which water can bypass your defenses—up from the drains and through the walls—is the art of comprehensive protection. Finally, acknowledging that the challenge continues even after the water recedes allows for a safer, more organized recovery. The ultimate goal is not merely to erect a wall, but to cultivate a state of readiness that provides security and peace of mind in an increasingly uncertain world.
References
Flood Defense Group. (2023, December 5). Examples of how to modify a HESCO Barrier. https://www.flooddefensegroup.com/examples-of-how-to-modify-a-hesco-barrier
Flood Defense Group. (2025, January 11). Are water filled flood barriers the ultimate solution for protection.
Flood Defense Group. (2025, March 21). Water filled flood barriers effective protection.
Floods-Barrier. (n.d.). Inflatable flood barriers. Retrieved January 15, 2025, from https://floods-barrier.com/product/en/list/inflatable-flood-barriers-1.html
HESCO. (n.d.). Flood barriers. Retrieved January 15, 2025, from
Post, H. (2024, January 5). Best flood barrier for effective flood management. TRDSF. https://trdsf.com/blogs/news/best-flood-barrier
U.S. Army Corps of Engineers. (2021). How to use sandbags. https://www.usace.army.mil/Missions/Emergency-Operations/Sandbag-Information/
U.S. Federal Emergency Management Agency. (2023, September 5). Protecting your property from flooding.